Tuesday, December 6, 2011

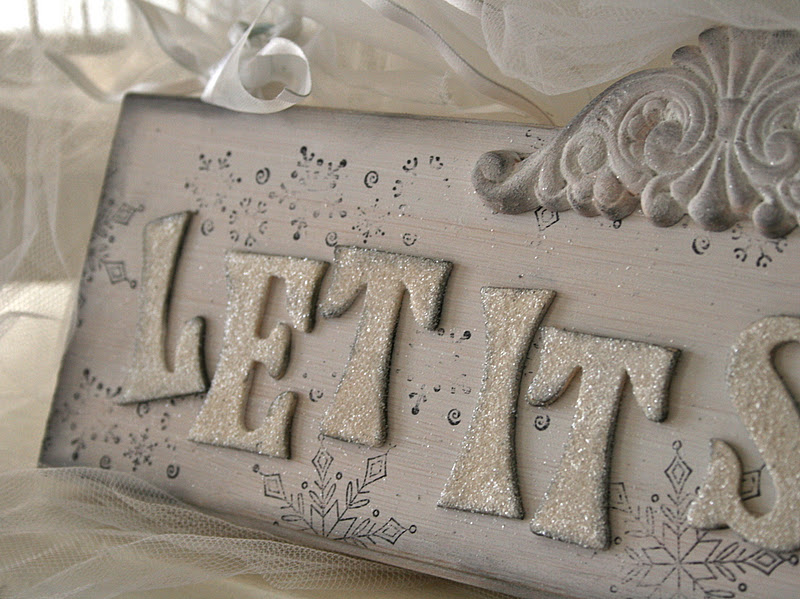
Let it Snow...a Little Glitter

Made a huge glitter mess the other day. I don't mind because I love glitter. I didn't really mean to spill it, though. I created a new sign for my house/shop (it stays up in my house until it sells)! It's similar to the French laundry sign that is in my shop (shown on right). I just applied glitter to the letters instead of stamping them. I did still distress them, though because I think it shows up a little better against the white background.


Anyway, here are some more views of it:


Linking to:
Faded Charm

Sunday, December 4, 2011

Craft Show Wrap Up and Display Ideas

So, I'm quite exhausted. The craft show was a lot of work and well, frankly, not worth it. I did make some money, but only made one third of what I made last year. Crowds were sparse. I did have a blast with my sister, though, and got to see people that I haven't seen in a long time, so it was successful in that way.

 I took some photos of my space with my phone (wish I would have brought an area rug to hide that orange red floor)!


 My wine charms were a big hit (they are also a big hit in my shop). I let customers decide which ribbon they wanted and I think they liked that.
 This table and chair set got a lot of looks, but no takers. It's my last furniture piece and I really want to sell it. The gift tags did not sell and i was so surprised as they were only three dollars. I displayed them on a tray and held them up with these diamond shaped crystal ornaments (everyone wanted to buy the ornaments, which, of course, I didn't make).
I only sold two sets of magnets, which also surprised me as they were priced pretty low. I displayed my joy wine charms in a muffin tray and on the tree (which people also wanted to buy -- the tree, mean).
I really liked how this part of my display turned out...got a lot of compliments and sold two boxes and three of my bags.

Switch plates were displayed next to my magazine article...I sold all but two, and got a custom order, so that was great!

One last look. So glad to be home...tomorrow I'm going to start decorating the house.

Thursday, December 1, 2011

Craft Show Stress (I mean Success)

Getting ready for my one and only craft show this weekend. Last year, I posted about craft show booth success here and here. This year, since I sold or gave away all my furniture, I have to start over with my display. I'm not ready. I have an idea in my head, but that's just about it...ahhh! I need to follow my own advice.

I'm working on the little stuff right now. For instance: I created this vintage jewelry magnet display from an old display stand I found for free at an estate sale (the ladies couldn't think of why anyone would want a metal sheet stuck to a wood board)!


 I gave it a coat of spray paint and then hand painted and stamped some wood letters and wood embellishments for the corners..ta da!!

I won't be posting again until Sunday (after the show). Wish me luck! Please stop by this Saturday, December 3rd if you are in the area! The Craft Bazaar benefits the Broadneck High School Bruin Sports Boosters. The show address is 1265 Green Holly Drive, Annapolis, MD 21409 and runs from 9:30 AM to 3:00 PM. It's huge!
Linking to:
A Little Knick Knack


Tuesday, November 29, 2011

A Tutorial: How to Paint a Camouflage Bookcase

And now for something completely different...a few posts ago, I blogged about creating a dream room for a little boy who is battling cancer. Read about it here and here. His mom approached me to create a camouflage bookshelf so I gladly said "yes!" (Not that I ever painted a camo bookshelf before.)
I started with this: a blonde wood bookcase with laminate shelves (below). Now, on to the tutorial:

1. I painted a base color of cocoa brown with Behr Paint and Primer (and yes, I tried to paint the laminate shelves, however, I could scrape the paint off with my fingernail so Plan B).
I asked my new buddy, Frank, (the man who made the ammo/helmet lamp) to cut two new shelves for Joey's bookshelf. Frank accepted the challenge and finished in one day. Thanks Frank! After two coats, the base coat was ready for camo!

2. Using the bedding pattern (sort of) from Joey's room, I sketched out a camo pattern on the outside of the bookshelves with chalk.

3. Then, I randomly marked where the colors should go. I worked with four colors -- brown, greenish brown (more like army green), tan and a lighter tan. Here's what it looked like (kind of like paint-by-numbers).

4. Leaving the base coat intact, I started painting with the lighter colors, painting them one at a time and letting them dry before moving onto the next color. I had to paint two coats on the lighter colors.
5. Then, I touched up any areas that needed touching up.
6. After it was finished, I stood back, looked at it, and added random base color to where I thought it needed a break in color -- where there was too much tan together.
7. After it dried, I added a coat of polyurethane (two coats to the top and the shelves) and well, here are the results! Sorry, couldn't get a picture of the whole thing in Joey's room (the rain outside made picture taking too dark and it looked bad with a flash!)


Monday, November 28, 2011

Attention Vintage Lovers: Cyber Monday Sale 15% Off All Day

I'm holding a cyber Monday Sale all day in my Country Tag Sale Shop! Save 15% on your total purchase  by using the coupon code: COUNTRYTAG15 at checkout. Here are some fun things in the shop:

VINTAGE TINSEL LIGHTS:
METAL NUMBER TWO:

EARRINGS AND NECKLACE SET

Have fun cyber shopping!!!

Sunday, November 27, 2011

Estate Sale Finds and Random News

Went to a HUGE estate sale on Friday...it was so crowded, that we actually left. Went back today for half price day and scored some great items even though it was stripped down to the bones. Here's what I got: beautiful vintage linens ... $1.00 for all five linens. That was the best bargain...the rest were okay, but I really liked the other items and couldn't pass up.

A great Pyrex butter dish for my shop:
A fluted vintage mold (which I'm using as a candle holder). I think it will look pretty on a silver tray for Christmas.
Some vintage, vintage-inspired tags:
Working double time this week to create some new things for an upcoming craft fair. I keep selling stuff from my store, so I have to replenish (it's good, but also stressful because I don't have enough inventory)!

Stay tuned, this week, I will be sharing a tutorial on how to create a camo bookcase.

******Also, tomorrow I am offering 15% off in my Country Tag Sale shop (vintage items) for Cyber Monday. Sale actually starts tonight.******

Friday, November 25, 2011

Oh Button Trees, Oh Button Trees, How Lovely are Your Buttons

Hope you all had a wonderful Thanksgiving! We sure did. My parents are here and my son is home from college. Just wanted to share this quick post and show off the rest of my button trees. These will go in my shop and to the craft show.
First up, this gorgeous (if I say so myself) doily-covered tree. I used pearlized pins by themselves as well as vintage buttons.


Next, a ribbon covered button tree:


Last, but not least, my youngest son's favorite: a tulle-covered, button tree:


Linking to: