Thursday, April 29, 2010

Busy, busy, busy

Spring is always bustling and busy for me -- especially with kid's sports, concerts, recitals, field trips, special days at school! It seems like everyone is trying to pack everything in before summer begins, add to that trying to make a living at home, and I may never see my pillow again! I have been extremely busy with my work -- finished my client's two bookshelves, another bookshelf (above, for sale) working on another client project, almost completed a children's beach-themed table and chairs and created many new collage works (they are so fun). I even sold one of my favorite collage pieces to a new friend the other day...very exciting! So, please forgive me if my postings are few and far between for the next couple of weeks...you can always check my website and etsy shops (yep, shops) to see what I've been up to! My etsy shops can be found at www.wherethegrassisgreen.etsy.com   and  www.countrytagsale.etsy.com

Here is the link to my website: http://web.me.com/rzemanski/Where_The_Grass_is_Greener/Welcome.html (you can also click on the picture of the dresser drawer to the right). Right now until May 31, I'm donating 20% of all proceeds from website (sorry, not Etsy shops) to the Juvenile Diabetes Research Foundation. Why not give that graduate (or anyone) a special, meaningful gift from the heart and help JDRF in the process? (Okay, that's it for my sales pitch.) Here's one sample of what you'll find:


Friday, April 23, 2010

Inspirations


I was very busy at my sister's house last Friday and ended up staying busy all week so that I could put more things on my website (click on picture of dresser drawer all the way to the right). The Juvenile Diabetes fundraiser is this weekend in Pittsburgh and I'm offering 20% of all profits made from the website to JDRF. I suddenly realized that I really didn't have enough stuff on the site, so I went to work. Most of the creations were inspirational art collages such as the ones pictured above.  As many of you know, there is also hand-painted furniture for sale on the website. I’m busy trying to get two adorable sailboat mirrors finished so I actually have something to show in my “Mirrors” section.
On another note, if you live in my area and want a fun place to visit and shop this weekend, go visit the gals at The Barn Show. Open four times a year (every season), this small “upscale yard sale” event offers an eclectic mix of fun finds -- galvanized Vermont syrup buckets, antique chairs and other furniture, country signs and architectural salvage -- just to name a few. The beautiful setting, a barn in the middle of the Davidsonville countryside, makes you feel like you've stepped into a Martha Stewart magazine spread. For more info., visit www.thebarnshow.com. Some of my treasures include three unique containers/boxes and a really heavy wood panel from an old cabinet. I’m going to make it into a chalkboard for my office…someday.

Tuesday, April 20, 2010

Creating in an Artist's Paradise

I had a wonderful weekend visiting with my sister and her family and my parents. We were all celebrating my niece's first holy communion. Maddie looked so special and beautiful in her flowing white dress and she wore the tiara that my sister and me wore on our first communion and my mom wore on her wedding day. 
Before the festivities (and after) my sister and I spent quality time creating in her amazing jewelry (craft) room. While my sis created her beautiful and unique pieces, I enjoyed "shopping" her incredible selection of supplies. Every time I said, "I wish I had..." she would say, "look over there" or "It's in the box marked..."She has a plethora of inks, papers, embossing tools, vintage jewelry...well, you name it, she's got it! I created so many fun things (which I will share later this week).
Her craft room is super organized, which inspired me to spend hours organizing my little space. As you can see in the before and after photos, I worked hard. If you know me, my house used to be organized, but with three boys and a messy husband, I had to surrender! I just manage to keep it clean, but it is cluttered. So, I asked myself after visiting Stacie, "since I have this little space in the back of my closet, why not strive for organization there?" The results are amazing. That's not to say that I'm neat when I'm creating, (ask Stacie) but now I have a place for everything and when I'm finished it looks great (for the back of a closet, that is). BEFORE and AFTER:

Wednesday, April 14, 2010

Treasures from Weekend Past...

I went on a treasure hunt this weekend for two purposes -- one, I'm writing an article about flea markets for Taste of the Bay magazine and two, I was on the hunt for vintage books, frames and boxes. I came away with those and more!!! I found a great little flea market near Annapolis (you'll have to read Taste of the Bay's June issue to find out more). I want to go back every week, but I'll have to control myself or my husband may ask me to move out!
For a mere $14, I kid you not, I came away with a wood side table, a jewelry box, a bag of books (antique, vintage, hardback),  11 frames, 3 with mats, and two wooden candle sticks (see photo). The side table is already at my studio and it has such beautiful lines, I may just keep it for myself.
I'm headed up to spend some time with my sister where she'll be busy creating jewelry and I'll be busy creating collage work. Look for my creations sometime next week!!!

Thursday, April 8, 2010

The ABCs of Painting Furniture

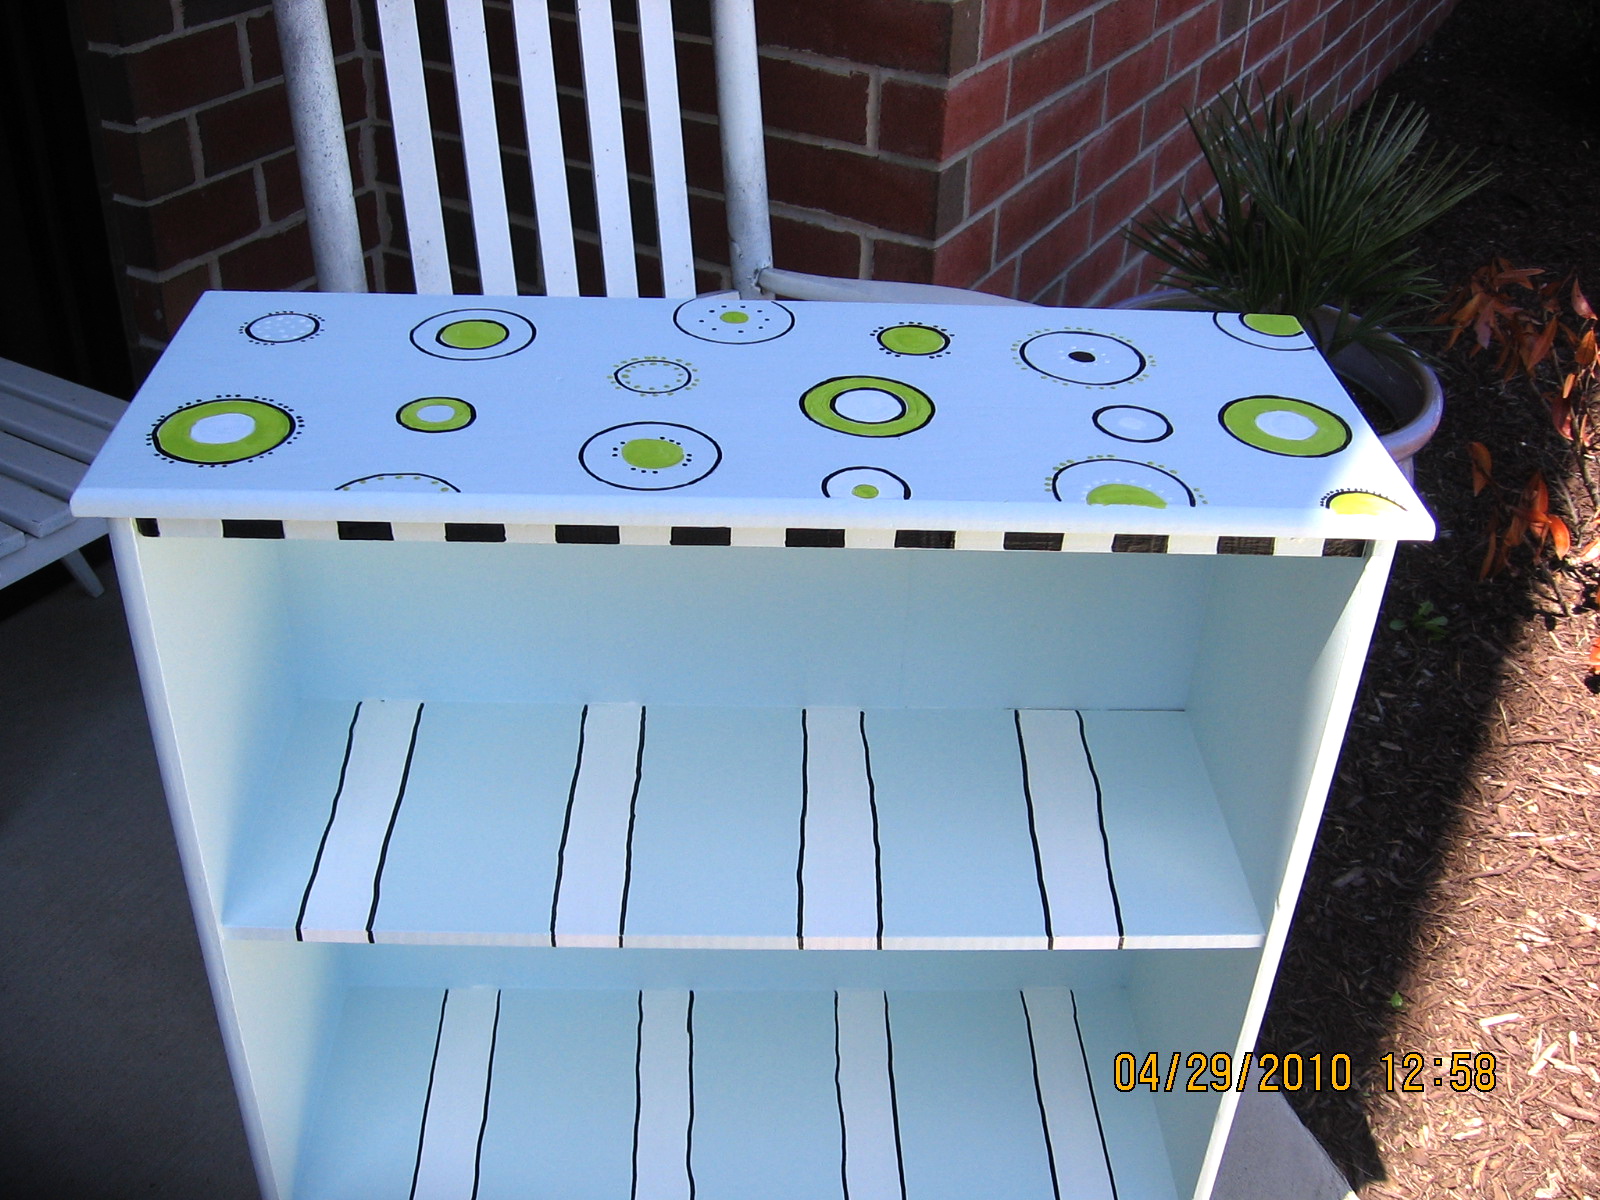
Where does the time go? Went back to my studio the other day after a long Easter break. I'm working on two bookcases for a friend's home and I am loving how they are turning out!

Many times, people ask me how to paint furniture. It's not hard, but it does take time and patience.

What you will need:
piece of furniture
fine sand paper
Paint brush (a good one, meaning a little more expensive one). If you get a cheap (under $3 or $4) paintbrush, it tends to provide an uneven coat and most of the time, you will start loosing bristles as you paint -- and unless you want "hairs" on your piece, you need to splurge. Use one that is made for latex-based paints.
1 quart of primer - Glidden Gripper, Kilz, etc.
1 quart of latex paint (check whoops section of paint store for bargains)
assorted pints/quarts of acrylic or latex paints
drop cloth
paint pans
rag to catch spills


1 (a) If the piece is stained (or painted a dark color and you want it a light color), you will need to sand it with fine sandpaper and then prime it with a paint or stain primer. I use Glidden Gripper, which can be purchased at Home Depot. Other primers are available, but this one works best for me. I don't use spray primers as they tend to clump up and drip, making the project even more labor intensive.
Sometimes, if the stain or dark paint bleeds through, you have to lightly sand again and use another coat of primer.

1(b) If the piece is unfinished, it still needs to be lightly sanded and primed, but only one coast of primer is necessary.

2. Next, you need to paint your base paint. For example, I used a rust latex paint as the base paint for the bookshelf above. Since I was painting a dark color over a light color, I needed to apply two coats of base paint. The person purchasing the shelves wanted the back of the bookshelf to be white and even though it was already painted white, I needed to add one coat to make it look fresh.

3. This step is where the fun begins! If you choose to, you can paint designs, either freehand (which I do) or with stencils. I personally don't use stencils because I love the look of a freehand design -- it never looks perfect and I believe it adds special character to the piece. I also like to outline my designs with a black paint pen to give them a more whimsical touch (see close-up of a mirror shelf I did).

4. Optional: since I paint a lot of children's furniture, I usually finish my project with a protective coating. I use an eco-friendly, non-toxic polywhey coating from Virginia Naturals on dark painted furniture. However, I have learned not to use this same polywhey coating on light or white paint as it will yellow the finish. For these finishes, I choose to use a protective wax coating or a water-based polyurethane (however, some people say that it can also turn yellow...it hasn't happened to me yet).

So, there you have it! If you want to try this on your own, please feel free to ask me any questions.