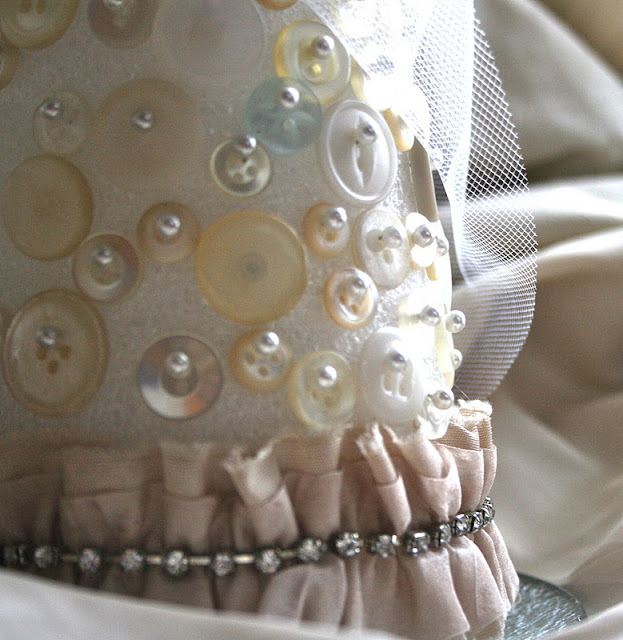
First, let me say that this is both easy and hard...I saw a gorgeous button tree on Pininterest and decided that I would make one for myself. After all, I had hundreds of buttons. I noticed that the tree was made using pearlized top pins and figured, "this would be simple to make!" Well, it is and it isn't... it takes patience and time (which I don't have, but alas, I managed).
Materials:
 +One cone shaped Styrofoam form. Tip: I recommend white if you want to make my particular tree that way you don't have to worry about covering the green. Or you can use ribbon and wrap it around the tree to cover the green.
 +Tons of white and mother-of-pearl buttons in different sizes (Way more than you actually think you need - no, I didn't count them, but I'm sure it's over 400.)
 +Pearlized pins - over 400. You will need them with the large balls on top or else they will go right through the larger button holes.
+Wire cutters
1. First, you will need to cut down about 50 of your pins with wire cutters because if you don't they will stick out the other ends at the narrow top of the tree. An easy solution would be to find smaller pins, but I couldn't find them in the all white pearlized.
2. Next, spread out all of your buttons so you can see them.
3. Starting with largest buttons, randomly place them around the tree with the stick pin through the button hole.
4. Move to the medium sized buttons and randomly place them around the tree.
5. Fill in with smaller buttons. You can layer them if you would like. I didn't (I told you I have no patience or time).
I have to admit it, after three hours if doing this, I cheated and decided to wrap the bottom of the tree with this pretty ribbon I bought at Stampington & Company.
5. I wrapped the tree with some white tulle ribbon just to add a topper and dreamy softness.
 I love how it turned out. I did make some other versions of button trees for my shop, which I'll post later (no where near as button filled as this one ... otherwise I would have to charge about $80 a tree!)


16 comments:
This is so sweet! You always use white in your decor so tastefully :)
so cute and pretty! love the sheen to it!
That is so elegant and pretty! Would look nice on my dresser! ♥
So lovely & elegant. These would make a grand decoration for a winter wedding!
Thanks so much for linking up to Make the Scene Monday!
Your patience paid off....Very classy and elegant!!!
I love this look! I think I will have to copycat this for sure! Coming over from Faded Charm and a happy new follower! Thanks for visiting me!
Jeanine
How pretty! I bet you were more than happy when you were done, I can only imagine how much time it took! Love that gorgeous trim on the bottom, too!
You created a beautiful tree ! To make it easier you can use map pins which are already short and have the round top ... or you can use sequin pins and sequins or beads ... can you tell I've made a few of these? Not as pretty as yours though !
Absolutely beautiful!!Thanks for sharing.Coming over from Faded Charm.
Happy WW.
Marie
What a sweet tree. Happy new follower from White Wednesday.
Laura
This really sweet, can see how hard and simple at the same time, sure would be pretty as placemarkers at teh dinner table too!
What an absolutely precious little button tree!
Cindy
I tried to make a similar tree about 2 years ago but I haven't put it out since. I tried putting feet on it but they won't stay on and it keeps falling over - lol
Yours is lovely. I had fun making mine.
The tree is beautiful. I will admire it from a distance, because I don't have your patience.
Love it! I'm going to try to make one. I'll post a pic ~ if it turns out as pretty as yours! lol Thanks for sharing. I'm your newest follower!
Cindy
This is adorable, LOVE it! thanks so much for sharing on VIF!
Post a Comment