

I had three signs to create for a client and I know she likes copper, rust and very earthy colors (in addition to an old world look) so I decided to experiment with paint. I wanted to create an aged copper look using paint on wood. So, I just experimented and you can join me in this experiment by following the steps below (note: this tutorial allows a lot of playing room, so get into a creative state of mind).
Supplies:
- Wood surface (in this case a pre-cut pine 1 x 4 with routered edges).
- paints (I used a combination of paints: DecoArt's Burnt Sienna, Raw Umber and Burnt Umber, plus some True Value Teal paint I had left over from a project and some acrylic tube paint that I found in my paint drawer.)
- Sponger applicator
- Rags or old socks (make sure they are washed first)
- Chipboard Letters for whatever you want to spell out (in this case, it's "Welcome")
- Vintage findings to embellish (I'm using a brass "W" that I found at a local flea market and old earrings
- Gorilla Super Glue
- Rubber stamp with script
- Ink
- Two Eye hooks
- Matching Ribbon

1. Paint your base coat on your wood. I used a combination of DecoArt's burnt sienna and raw umber. Let dry.


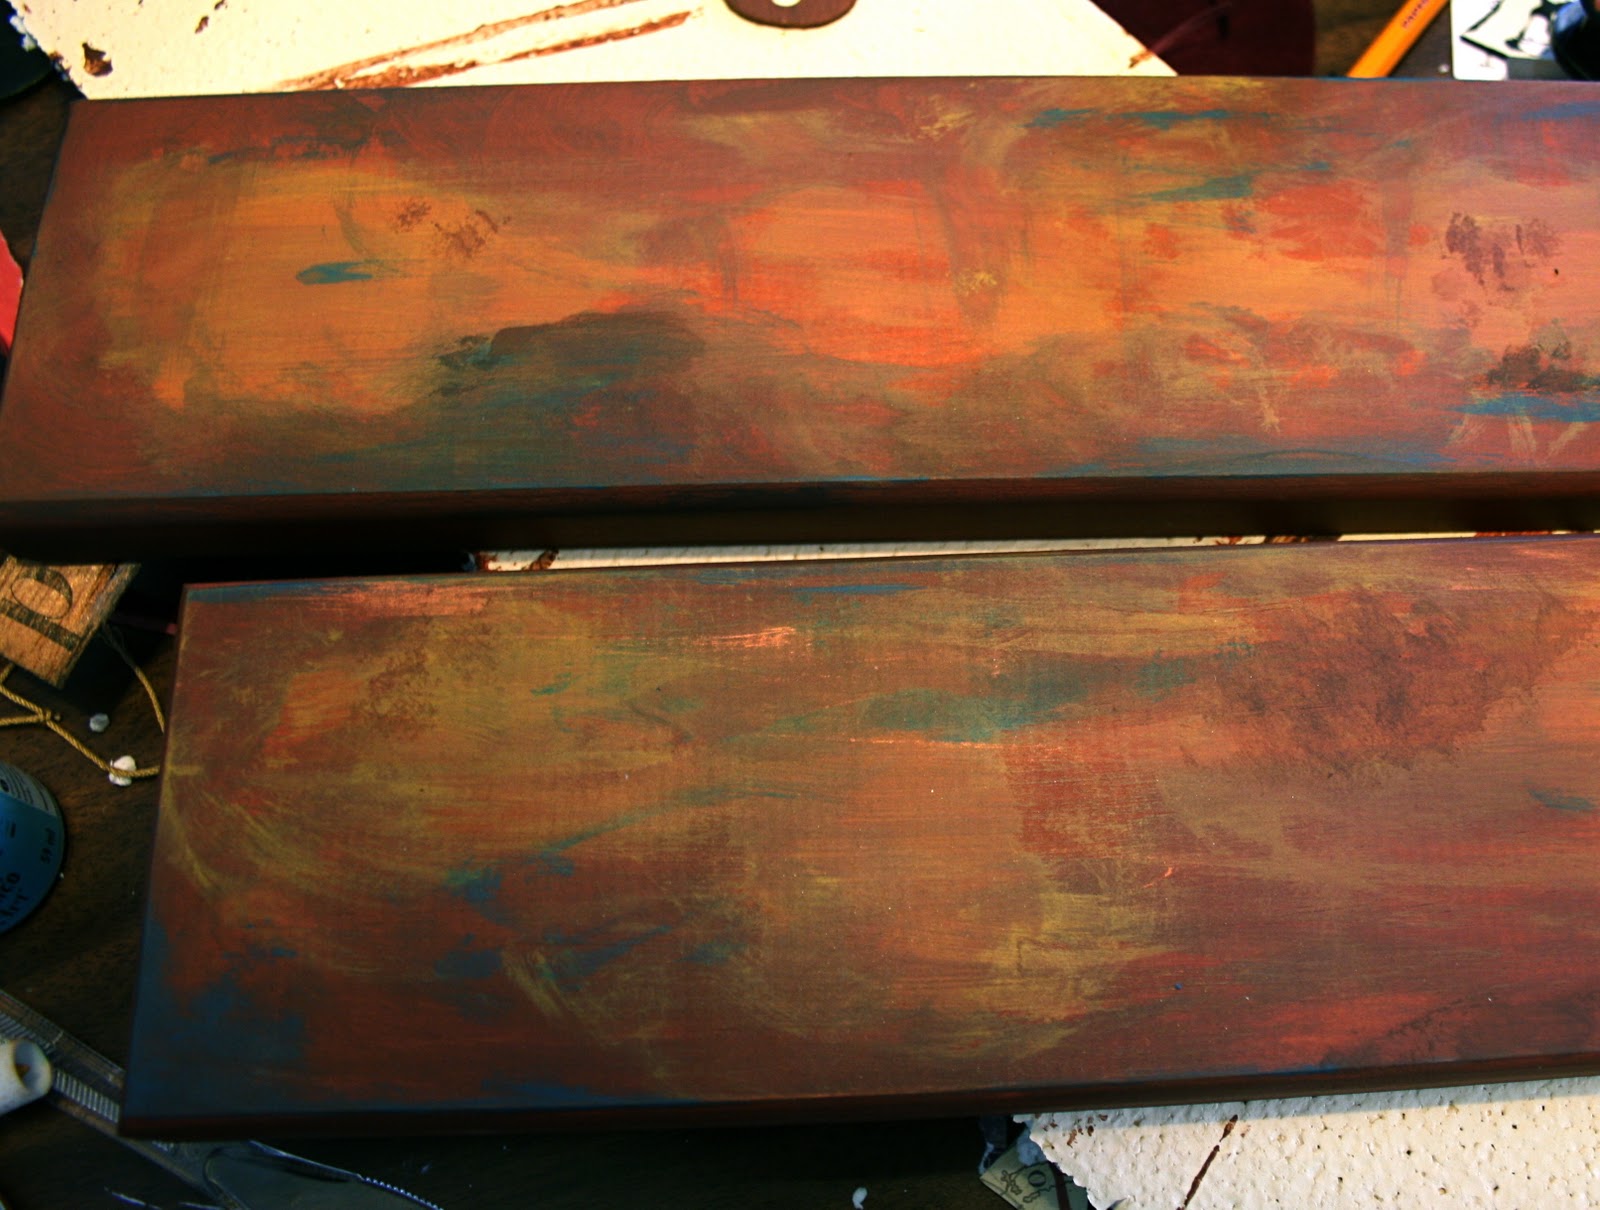
2. Here's where the fun begins. Dab on some raw umber along the edges and sides of the sign and then dab off with old sock.

3. Add a few sporadic drops of paint -- teal, ochre, burnt sienna -- then take your sock an blend it until you like the look. Keep adding paint in areas and blending.

4. This is the result -- a rich, warm background for your sign. Tip: I used some of the teal and rubbed a bit of it on the routered edges of the sign.
5. While the background dries, paint the letters. I couldn't decide between black, burnt sienna or raw umber. In the end, I opted for raw umber. Let these dry.

6. Once dry, you can randomly stamp your script on the sign and letters. I also hand wrote a little saying "Love and faith celebrated" that my client wanted incorporated.

7. I chose to use the backside of the metal W because it had a lot more interest. To make it look even more aged, I rubbed black distress ink along the sides. Next, add letters and embellishments. Using my trusty Gorilla Super glue I affixed the W and then glued the rest of my letters.


8. I wanted to add a little more interest so I decided to search rough my stash of vintage findings. I found these cool copper colored earrings so I took them apart and glued them in an artsy kind of way.


Now you can hang your welcome sign for all to see!

Linking to :


10 comments:
I LOVE how you mix your colours to make the piece really stand out! You've inspired me to step out of my comfort zone and try some colour - Thanks!
That's very cool. I love how different it is from the usual white. Your colors look great together!
This is amazing. The transformation is so impressive. love this!
ladeedacreations.com
and thanks for showing how to make it. My mom would love this but not sure I could do it as good as you.
You're right...it is amazing what you can do with paint. It came out great. I am your latest follower. I would love for you to come and check out my blog and follow me back at www.diybydesign.blogspot.com. Thanks so much.
Lovely sign. Your client is very luck to have you.
Thanks for visiting my blog
Carolyn
Great effect. I love the small writing underneath too! Lovely.
I love what you did with the color. This turned out awesome.
Great Job :)
<3Becky
justbeckause.blogspot.com
Great tutorial! Waaay back when, I used to teach faux finishes - faux rust, marble, stone, etc. - not just a wall treatment. I loved experimenting with colors to come up with new finishes. This makes me want to try some updated versions.
Love the script stamp and findings. Awesome sign!
That is great!!!!!I'm hosting my first Linky party and would love for you to submit to it!
http://runwithglitter.blogspot.com/2011/03/glitters-first-linky-party_22.html#comments
Love the idea of taking scrapbooking techniques to signs. This is so fun. That layered look and the embellishments are so intriguing.
Thanks for sharing on Motivated Monday at BeColorful
Pam
Post a Comment